 Follow the link HERE for instructions and ingredients!
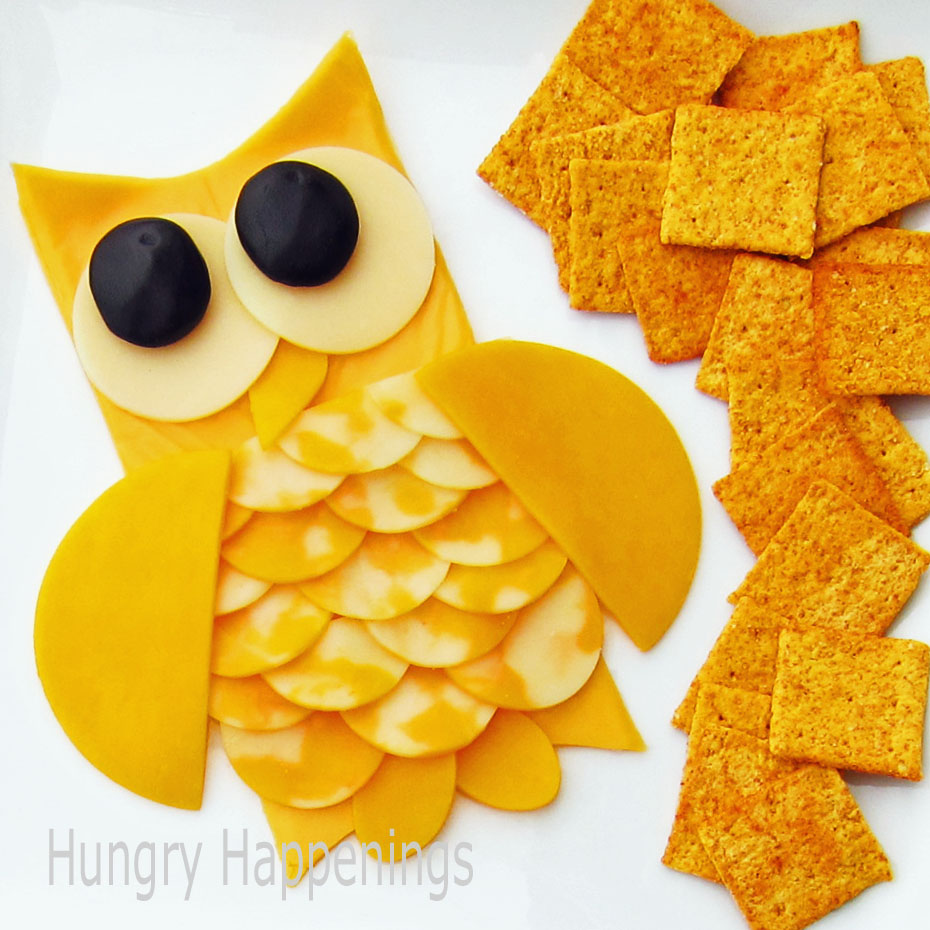
Owl Appetizer
Follow the link HERE for instructions and ingredients!You can do it – Here's how!
Year: 2011
Follow the link HERE for instructions and ingredients! What does it take to transform a pile of old T-shirts into spectacular works of woven art? Just a spare hula hoop or embroidery hoop and the techniques we’ll show you here. The oversize looms and easy-to-use loops of T-shirt fabric make these projects particularly appealing to beginning weavers. Learn the basic hoop weaving technique by crafting a colorful accent rug to brighten up a room.
Before you begin, some terms you need to know: the warp is the material you string on the hoop, the weft is the material you weave with.
 For the warp, cut 1-inch-wide loops from the bodies of one or two tees (we found a boy’s large worked best on our 33-inch hoop), removing the hem and stopping at the sleeves. Ideally these loops should all be the same color; we used two colors for clarity in our photographs. You’ll need a total of 11 loops. For the weft, cut at least 50 loops from the remaining shirts. Save the unused sleeves for the basket project.
 Stretch one warp loop over the hula hoop, as shown.
 Add and secure a second loop, perpendicular to the first.
 Repeat, filling in the spaces, until all 11 loops are in place.
 Push together two warp loops at the top of the hula hoop, as shown. This creates an odd number of warp spokes in your wheel, which allows the overunder pattern of the weft to alternate with each new row.
 Secure the first weft loop to the center of one of the warp spokes (we chose the doubled spoke from step 5) by wrapping it around the warp and then looping it back through itself.
 Begin weaving the weft over and under the warp spokes, forming a tight spiral. For now, treat both parts of each warp spoke as a single unit, weaving over or under the two together. As you work, push the weft material toward the center of the hoop and keep it just snug. If you pull the weft tight, the rug will develop lumps or bends. When you reach the end of the piece of weft, add a new loop by threading it through the end of the first and back through itself.
 When your rug is about 8 inches across, begin treating each warp spoke as two individual strips instead of a single unit, weaving over or under each strand instead of going over or under the doubled spoke. This increases the number of warp spokes, improving the structure of the project. When you get to the two warp spokes that you pushed together at the top of the loom, separate them. Treat one of the spokes as two individual strips, but continue to treat the other as a single spoke. This maintains the odd number of warp spokes.
 When the rug is the size you want, but no closer than 8 inches from the edge of the hula hoop, snip open your weft loop.
 Tie the ends around a warp spoke, and tuck the ends into the rug. Cut the warp spokes off the hoop one at a time.
 Tie the ends in pairs, then trim them to make a fringe or tuck them back into the rug.

Materials: Stranne Standard Light,Thin card, scissors, glue and punch
Description: Old lights remodelled into a flower light. WIP at the moment. Thin card layered flowers cut from hand and then added to each of the tiny lights. Remove the bulb push on the flower and then screw the bulb back into the holder. Can’t be too thick as the bulb won’t go back on and connect.

“I made an Ikea hack of my own a few weeks ago and thought you’d like to share it too. The shelf is made from a 40cm wide Billy shelf and it cost only 15€ (the shelf was a bit damaged at the store but it suited our purpose fine) and 5€ for the carpet (so that it’s not slippery). We also added a few corner irons and bolted the shelf to the wall so it wouldn’t fall when our cats play in it. …
40cm wide might be a bit too small for most cats but not for this breed. The shelf fits in the tiniest area, providing our cats access to the top of a closet with minimal damage to the walls of our rented appartment. The pics propably say more than a thousand words about how the shelf was altered, but I must say that we did use a lot of glue on the boards so they wouldn’t flip (in addition to the corner irons).”
more info via

