Category: Crafts

Scribble Coasters


You will need:

1. Bubble wrap with large bubbles


2. Selection of colourful carrier bags


3. Thread


4. Sewing machine


5. Iron


6. Ironing board


7. Teflon sheets or baking parchment / Baking paper


8. Felt off cuts at least 10cm sq.

Check out Julie’s website for the instructions and more great recycled crafts!

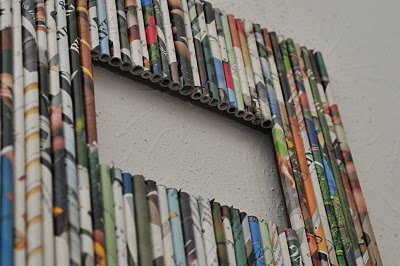
Magazine Frame

What you need:
..magazine pages
..elmer’s glue
..frame mat
..scissors
..glass
..glossing spray
..tape

Roll the magazine pages in the shape of a straw and glue the tip.
I then glued the magazine straws onto a surface (frame mat). I custom cut a piece of masonite using my scroll saw.

Continued glueing. Press firmly.

Once magazine straws are glued to the mat, cut the dead ends. Let dry.
You can then use scissors, an exacto knife (craft knife), rotary blades, etc. I used my scroll saw to assure a straight cut.

After all straws are cut, apply your gloss shine (1-3 coats – your preference). After this is done, you can attach the glass to the back of the mat.

View complete photo instructions HERE

Felted Ornaments

ornaments-3.jpg
It’s all about doing more with less this holiday season. So deck the halls with these miniature wreath ornaments made from cast-off wool sweaters. Felted sweaters are a thrifty and eco-friendly way to use recycled materials. Your old moth-eaten or thrifted sweaters can be made into plush toys, mittens, patchwork blankets, skirts, purses, scarves, laptop covers or anything else that you can imagine. The possibilities are endless. To felt a sweater, you must wash it in hot water and run it through the dryer. Keep in mind that your sweaters must be 100% wool in order to felt properly.
ornament-close-up.jpg
ornament-detail.jpg
I used tapestry needles for this project because they are easy for young kids to handle and have a blunt tip. You could make these ornaments as large as you want, but if you get any bigger than 5″ in diameter you might need to use wire to keep the circular shape.
Supplies:
· Felted sweaters
· Tapestry needle
· Heavy-duty coated cotton thread
· Twine or ribbon
Instructions:
Once felted, you’ll need to cut your sweaters into 1″ squares. Older kids can do this, but I find that my young kids are frustrated when trying to cut any type of fabric. After I cut the sweaters, I put the squares in a bowl for the kids and let them choose their colors. You’ll need about 50 squares for each ornament. This may seem like a lot but once you get going, it moves along quickly.
bowl-of-felt.jpg
Then cut a length of thread at least 30″ long. Thread the needle and tie the ends of the thread into a knot, forming a loop. You’ll want to make a couple of knots so that it won’t slip through the loose fibers of the sweater. Older children can practice their knot tying skills. I have found that a loop is easier for children to sew with as the needle won’t come un-threaded.
The kids can string the felt pieces by simply poking the needle through the center of each square. Once the thread is close to full (with a few inches on either end), you’ll want to make sure that it will form a nice loop. You can see that my kids ran out of patience on a couple of these. Then you can pull your knot down a bit to make room to tie the two ends together a couple of times. An adult or older child will need to do this as the thread needs to be pulled tightly. Then add some twine or ribbon for hanging and you’re done. via
stringing-felt.jpg

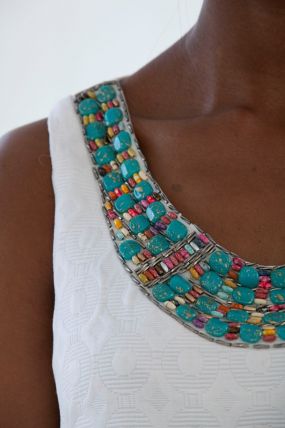
Beaded Clothes

Would you like to add some beaded glitz to a garment? Don’t think twice about it. Beading is one of the easiest and most eye-catching ways to upgrade a garment—whether it’s handmade or store bought. Here’s what you need to know to bead a ready-made garment.

A simple running stitch is all that’s required to add a line – or many lines – of beads to a garment. Simply move the needle and thread in and out of the fabric, pick up a bead and then repeat. Here’s what you’ll need:

  • Sharps or regular beading needles
  • Polyester, cotton, or silk thread that matches your fabric
  • Beeswax (to strenthen and stiffen the thread)
  • Beads!
  • Embroidery hoop (optional)
  • Fabric marker

Follow the complete instructions HERE