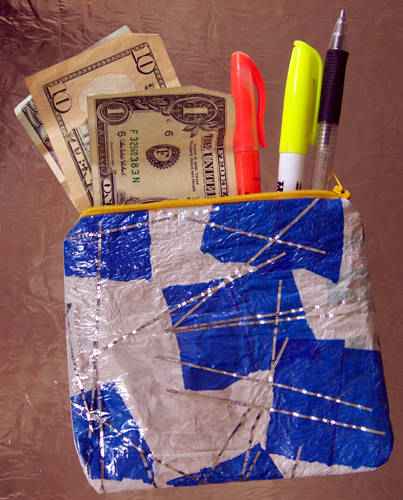
 Recycle plastic shopping bags to make fabric for crafts!
You’ll need:
- 3 or more clean plastic bags
- scissors
- iron and ironing board
- large sheets of paper
- well ventilated area for ironing
follow the step-by-step instructions here.
You can do it – Here's how!
Category: Crafts
Recycle plastic shopping bags to make fabric for crafts!
You’ll need:
follow the step-by-step instructions here.
If you collect T-shirts like I do, then you’ll need to make room in your closet for more… What do you do with the old ones?? Turn them into a quilt, of course!

Supplies:
– 24 cotton t-shirts (this was for a 4 x 6 square quilt for a twin-size bed). You may want extras so that you can decide to leave some out at the end if they don’t fit your color scheme.
– fabric scraps galore (these should be strips of fabric, up to 14″ in length, in widths from 1-4″)
– large piece of fabric for backing (2 yards (72″) by 3 yards (108″) gave me enough extra to make a border for the front as well)
– rotary cutter, cutting mat, long plexi-glass ruler, and scissors
– sewing machine, pins, and thread
– iron and fusible interfacing
– heavy-weight batting
– 3 skeins of embroidery thread in a neutral tone and an embroidery needle
complete instructions here
What’s more beautiful than a rose? A rose made of Duck Tape. There’s no dirt and no thorns to deal with. Plus, you don’t ever have to water it.
Give a hand-made Duck Tape rose to someone special and he or she will be stuck to you like…let’s just say it’ll be appreciated.

Supplies and Tools
•Duck® brand Duct Tape
•Straw
Optional Supplies and Tools:
•Scissors
Skill Level
Beginner
Approximate Crafting Time
20 minutes

Step 1
Take your straw and cover it in tape (lengthwise works the best). This step is completed best if you roll the straw across the tape, sticky-side up.

Step 2
Cut several strips of duct tape – about 2 inches each.

Step 3
Sticky side up, fold one edge over itself, leaving some stickiness on the side and bottom.

Step 4
Take the parallel edge and fold it over, leaving only stickiness on the bottom of the strip.

Step 5
Roll this across tightly; this is your center.

Step 6
Insert the center piece from Step 5 into the top of your straw.

Step 7
Repeating Steps 2-4 with strips of duct tape, loosely bind the strips around the center (these are your petals). Make sure to adhere the petals to the both straw and the center piece from Step 4. Continue until you’ve reached the desired size.

Step 8
For the leaves under the rose, repeat Steps 2 – 4 with the same color that you used for the stem. Wrap these pieces around the stem at the base of the flower to cover up the tape edge.

Have you ever wondered why the string of prayer beads used by Catholics is called a rosary? Well, the answer lies in the bush outside your window. Once, the beads in rosaries were made from rose petals. Many modern rosaries are made from wood, silver, or glass, but it is still possible to buy rose beads. Or, if you are a rose gardener, you can simply make your own. These beautiful and fragrant beads make unique jewelery and a wonderfully personalized gift.

Making rose beads from rose bushes (actually, you will use the rose petals from the roses themselves) is not really that hard. It is also a great project that you can do with your kids this summer. Here is how to make rose beads from rose bushes.
Here is what you’ll need:
* Several quarts of rose petals. This is an excellent use for the flowers from your rosebushes that are just starting to wilt.
* A food processor or grinder
* Plastic wrap
* A cast iron skillet
* Thin nails
First, grind or pulverize the petals thoroughly. Then spread them in the skillet, cover airtight with plastic wrap, and set aside.
Once a day for 10-12 days, scrape the mixture out and regrind it. Eventually the petals will turn into a dark, putty like substance. Now you can mold the paste into beads of any shape you like.
Put a nail in each one where you would like it to be threaded. Leave the nails in the beads and set them in a sunny spot to dry for a couple days.
Remove the nails and, voila! You have rose beads. Happy Jewelery Making!
Use inexpensive supplies to make this mouse bookmark; shoestring, beads, felt, googly eyes and a pom-pon.

complete instructions here
Scout Idea: have your scouts make the craft and write out the poem to keep.
They then tie a knot in the string every time they do a good deed.
This saucy creature is a mouse
Most mothers won’t let one in the house
See, this one it has quite a tail,
Each scout made one without fail.
Take it home and help all week,
and for good turns you must seek
for every good turn that you do
tie a knot in the string…make quite a few.
Remember why each knot you tied
and how much to help you really tried
and then next week, please take your turn
to tell us all, so we can learn…
just what you did to help at home
a ready helper you have grown!
poem via

