
It’s all about doing more with less this holiday season. So deck the halls with these miniature wreath ornaments made from cast-off wool sweaters. Felted sweaters are a thrifty and eco-friendly way to use recycled materials. Your old moth-eaten or thrifted sweaters can be made into plush toys, mittens, patchwork blankets, skirts, purses, scarves, laptop covers or anything else that you can imagine. The possibilities are endless. To felt a sweater, you must wash it in hot water and run it through the dryer. Keep in mind that your sweaters must be 100% wool in order to felt properly.


I used tapestry needles for this project because they are easy for young kids to handle and have a blunt tip. You could make these ornaments as large as you want, but if you get any bigger than 5″ in diameter you might need to use wire to keep the circular shape.
Supplies:
· Felted sweaters
· Tapestry needle
· Heavy-duty coated cotton thread
· Twine or ribbon
Instructions:
Once felted, you’ll need to cut your sweaters into 1″ squares. Older kids can do this, but I find that my young kids are frustrated when trying to cut any type of fabric. After I cut the sweaters, I put the squares in a bowl for the kids and let them choose their colors. You’ll need about 50 squares for each ornament. This may seem like a lot but once you get going, it moves along quickly.

Then cut a length of thread at least 30″ long. Thread the needle and tie the ends of the thread into a knot, forming a loop. You’ll want to make a couple of knots so that it won’t slip through the loose fibers of the sweater. Older children can practice their knot tying skills. I have found that a loop is easier for children to sew with as the needle won’t come un-threaded.
The kids can string the felt pieces by simply poking the needle through the center of each square. Once the thread is close to full (with a few inches on either end), you’ll want to make sure that it will form a nice loop. You can see that my kids ran out of patience on a couple of these. Then you can pull your knot down a bit to make room to tie the two ends together a couple of times. An adult or older child will need to do this as the thread needs to be pulled tightly. Then add some twine or ribbon for hanging and you’re done. via

Category: Kids
Toddler Dress from Adult T-Shirt
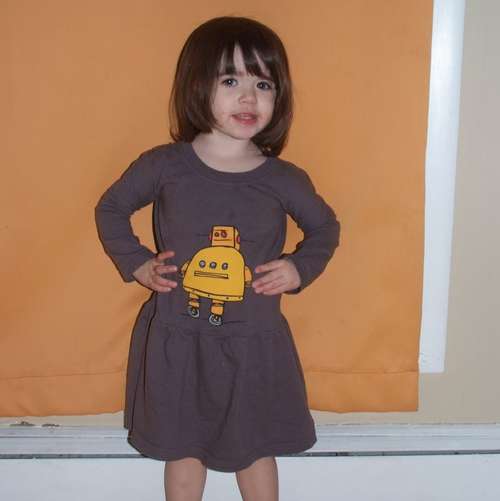
Follow the complete INSTRUCTIONS HERE
Teaching Your Kids to be Thankful
Thanksgiving is the perfect time to teach your kids about being thankful. Here are some ideas to teach your children how to appreciate the blessings in their lives.
Giving Thanks Placemats
The goal of this craft is to create a collage filled with drawings and pictures of all the things your children are thankful for. Cut photos from magazines, or print some photos from your computer. Older children can write captions under the photos or draw their own. Be sure to put the child’s name and the year on it.
If you make this collage from two standard letter size pieces of construction paper taped side-by-side, you can take the completed collage to a copy shop when you’re done and have it laminated. It then becomes a placemat that you can use every Thanksgiving for years to come.
Thankful Paper Chain

Another way to remind your children of their blessings is to create a paper chain. This is similar to a regular paper chain – where you cut strips of paper and connect them together as loops, but there’s one difference. You write on the strips of paper before you connect them. Write the things you are thankful for with your children. For instance, “Grandma plays games with me” or “My teacher is nice.” The fun part of this activity is to make the chain as long as possible – showing all your blessings. If you’d like to keep this up during Christmas, just use green and white paper.
Thanksgiving Tree
This is another take on the idea above and works really well if you have several kids in the family. Get each child to trace their hand on yellow, red, or brown construction paper. Cut out the hand shapes and write (or have the child write) what they are thankful for on the hand shape. Cut a tree trunk shape out of brown construction paper. Glue it on a large piece of poster board. Let the kids add their hand shapes as leaves above the tree trunk, turning it into a beautiful fall colored tree.
Thankful Book
This idea is similar to the others, except it’s more of a keepsake. Purchase a photo album or scrapbook kit and make a “blessings” theme. Add photos of loved ones, including stories about why they are special to you. Also, include pages of your favorite foods, favorite stories, favorite movies and all the other things that make you happy. Any time your kids feel down, you can open your blessing book to see all the reasons you have to be happy – and thankful for the blessings in your life.
Socktopus
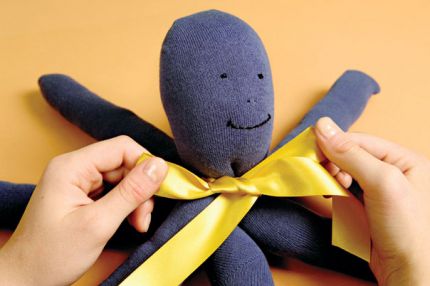
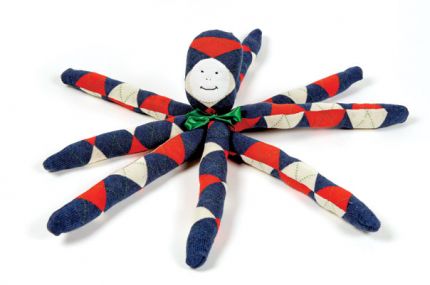
What You’ll Need:
Cotton thread for sewing
Embroidery needle
Embroidery thread
Four Ladies’ trouser socks of the same size
Polyester fiberfill or cotton alternative (Michaels.com)
Ribbon
Scissors
Sewing needle
Optional: 2-inch diameter circle of felt
First, cut up four socks
Before you cut, wash the socks to make them nice and soft.
1. Turn one sock inside out. Cut it down the middle through both layers, leaving 1⁄3 of the length intact at the toe end. This sock will form the head and two legs.

2. Turn the other three socks inside out, and cut the toes off of them. Then, cut all of them in half lengthwise through both layers to form two strips from each sock.

Next, sew and assemble the head and legs
To sew the legs, you can hand stitch or use a sewing machine. If you choose to hand stitch,
use a backstitch.
1. Sew the legs on the sock that forms the head. Fold each strip in half lengthwise, and sew along the long edge and the short open edge with a 1/4 inch seam allowance. Trim the threads, and tuck in any remaining fabric. Leave an opening at the bottom (by the “head”) for stuffing.

2. Turn the sock right-side out, and stuff the legs with polyester fiberfill.Make sure that they are stuffed evenly. Then, stuff the head, and hand-sew the opening at the bottom closed.

3. Sew each of the remaining six legs closed.Leave one end open for stuffing, and sew with a 1⁄4-inch seam allowance. Then trim the threads, and tuck in any remaining fabric.

4. Turn each leg right-side out. Stuff each leg, and hand-sew the ends shut.

5. Attach the rest of the legs.Sew the legs to the base of the head.

Finally, adorn the Socktopus
If your socks have a very busy pattern, you might want to sew a felt oval to the head, as shown top right, before you embroider the face. Here, I embroidered the face directly on the sock.
via
Magnetic Catch All

Materials
- 1 jumbo-size muffin pan
- Self-adhesive magnetic sheeting (sold at craft stores)
- 6 (16-ounce) plastic cups
- Instructions
-
- Simply cut out circles of self-adhesive magnetic sheeting and stick them to the bottoms of the plastic cups. This will make them tip-resistant once you set them in the pan.
- via

