Category: Kitchen
Homemade Krispy Kreme Doughnuts
(Makes 10 – 12 doughnuts)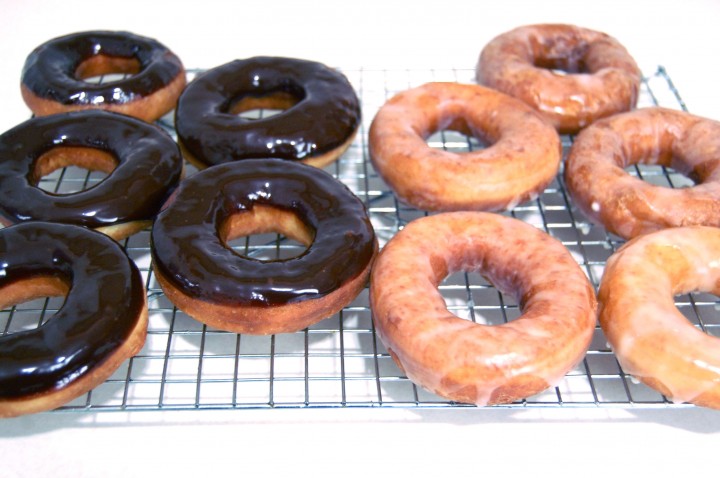
2 tsp active dry yeast
1 cup whole milk
12oz bread flour, divided
3 egg yolks
2 TBSP superfine sugar
1/2 tsp salt
1/2 vanilla bean
1/4 tsp vanilla extract
2 oz butter
vegetable oil
– Heat the milk to 100 degrees. I just pop it in the microwave for about 20 seconds. Stir in the yeast until it is dissolved. Transfer to a medium bowl and add 5 1/2 oz of the bread flour. Stir until it forms a smooth paste. Cover the bowl in plastic to prevent drying out and place in a warm spot to rise. The inside of a gas oven is a great place, oven turned off of course.
– When the paste has doubled in size (about an hour, depending on the temperature of your house, it will now look more like a sponge), add it to a kitchenaid mixer fitted with a paddle attachment. Add the egg yolks, superfine sugar and salt and mix on low speed until smooth.
– Split and scrape the seeds from the vanilla bean and add to a small pot with the butter and vanilla extract. Heat just until melted. Add to the dough in the kitchenaid mixer and mix on low speed until smooth. With the mixer running, slowly add the rest of the flour, sprinkling in at the side. Keep mixing until it just comes together into a smooth dough. It will be quite wet and sticky, but should be able to hold together as one “lump” of dough. If not, add a bit more flour, one TBSP at a time.
– Brush a large bowl lightly with vegetable oil. Place the dough in the bowl and cover with plastic wrap. Place in a warm spot to rise.
– Once the dough has doubled in size, pop it in the fridge for 15 minutes. This will make it easier to roll out.
– On a well-floured surface, gently roll out the dough to about 3/8” to 1/2” thickness. Use a cutter to stamp out whatever shapes you like. Place the stamped dough on a parchment lined sheet pan, cover with plastic and allow to rise again in a warm spot.
– Once the doughnuts are almost doubled in size, begin heating 1 1/2 to 2 inches of vegetable oil in a large pot. When the the oil reaches 360º start frying the doughnuts in batches. Fry them until golden brown on each side, the total frying time will be under 2 minutes. Use tongs to flip and retrieve them.
– Allow to drain on a wire rack over a sheet tray. While still warm, drizzle with glaze. If making chocolate doughnuts, wait until they have cooled and then dip half in the chocolate glaze.
Glaze:
1 1/2 cups powdered sugar
1/2 tsp vanilla extract
1/8 tsp salt
1/4 cup milk
– Combine all ingredients in a small bowl and stir until smooth. If it is lumpy, pour it through a fine mesh strainer.
Car Emergency Kit
Reblogged from ripsinmyjeans. It’s super easy and very cheaply made.
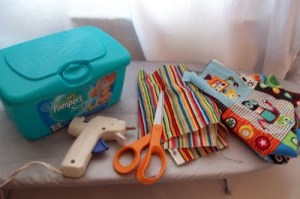
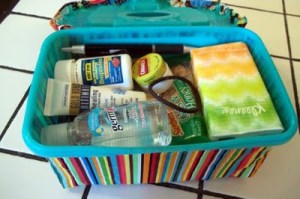
Just get yourself a wipes box (a plastic shoebox will work to, but this is what I had on hand), some scrap fabric, scissors, and a glue gun.
Cover the box with the scraps.
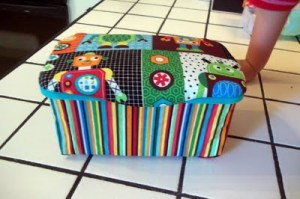
And then fill it.
I put in a grocery bag for trash, wipes, a diaper, hand sanitizer, band aids, pain reliever, lotion, tissues, a safety pin, a hair elastic, a five dollar bill, a granola bar, a pen, Carmex, and some fruit snacks.
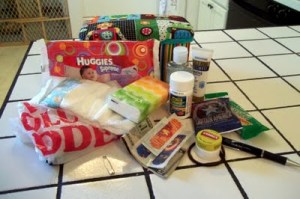
Shut the lid.
Now you’re ready for anything. Like when your bra strap breaks or someone tries to hand you a half-chewed gummy worm.
Silk Tie Dyed Eggs
Reblogged from ourbestbites:
You need 100% silk for this to work. Make sure to check the labels to make sure you’re not buying polyester, which can look similar. I grab old ties at the thrift store where they’re usually pretty cheap. And remember: when it comes to ties, you may not want ugly ones on your man, but ugly ties do make pretty eggs! You could also use silk from an old blouse, a scarf, or whatever. So if you’re rummaging through a thrift store, check out some other areas as well.
I try to find an assortment of colors and patterns. Usually dark blues, purples, and reds work the best, but it’s fun to experiment with all kinds of things. The interesting thing is that you never know how much of the color and pattern will transfer to the eggs. Sometimes ties I think will be awesome really disappoint, and ones I didn’t think much of make the most beautiful eggs. Here’s some of the ties I grabbed from my local thrift store:

Usually it will tell you if it’s 100% silk right on the main label of the tie, but a lot of them don’t, and if that’s the case, check that little tiny end, it’s usually hiding there.

The first step is to deconstruct the tie. Snip the seams and remove the lining so you are just left with the silk. (And yes, this old Christian Dior tie, which I love, was only 50 cents at the thrift store! If it was a skirt, I would totally wear it. I have gotten many angry comments about the fact that I destroyed a Christian Dior tie. Honestly, for 50 cents I really don’t care who’s name is on it. Get over it, people!)

Next you cut a piece large enough to cover an egg. Wrap the egg with the right side of the fabric making contact with the egg. The right side is the printed side, or the side that would be on the outside of the tie. You want to try to wrap the fabric as tight as you can without breaking the egg of course. The more direct contact the silk has with the egg shell the clearer the imprint of the pattern. Where there are folds in the fabric you’ll get kind of a swirly water color effect. I love those parts- it adds to the charm. Once wrapped, tie with a piece of string or a twisty tie. (Do yourself a favor and go with the twisty tie!)
 Now, notice how I tied the eggs in the above photo- with the tie on the top of the long side of the egg. If you do this, the opposite end of the egg will have the best pattern. If you are going to be sitting the eggs upright in an egg cup, this is the best way to wrap them.
However, if you want the best part of the design on the wide side of the egg, you’ll want to wrap them horizontally, like this:
 Just wrap them as smoothly and tightly as you can for the best transfer.

I wish eggs came like this at the grocery store. I would probably buy a lot more eggs if they were dressed up in their silky best.


After the eggs are wrapped in silk, you’re going to wrap them again with a light colored light weight piece of fabric. An old pillowcase, sheet, or thin dish cloth is perfect. If you go to the thrift store to get ties, you may want to grab a pillowcase too. Otherwise you might get impatient at home and just take one from your kid’s room. Don’t tell my husband I did that.

Put all those little guys in a pot and cover them with water. Add 1/4 C vinegar and bring it to a boil. After about 20 minutes you can remove the eggs and set them in a colander or on a towel to dry and cool. Once they’re cool enough to handle you can remove the fabric.
This is my favorite part. I get so antsy waiting for them to cool. It’s always a surprise to see what went on in that little package.

Below are some of my results. I have to say that the first one is probably my favorite egg of all the ones I’ve ever done. I can’t believe how clearly those flowers transferred and how bold the colors turned out. Incredible!

Cookies ‘N Cream Fudge Oreo Brownies
1 box Brownie Mix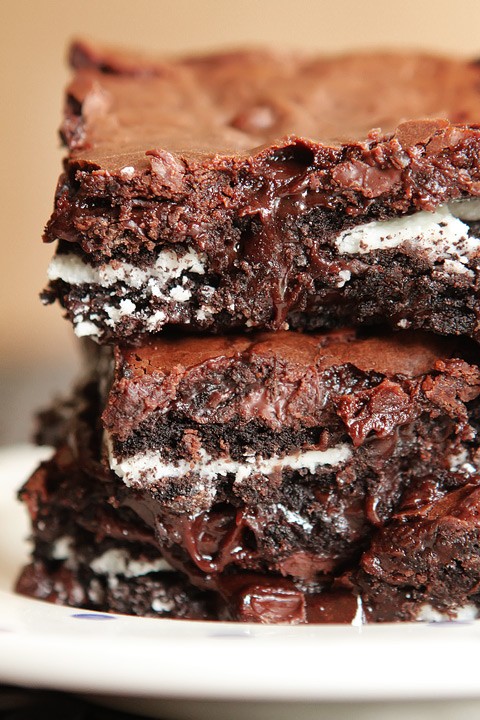
eggs & oil (as called for by the brownie mix)
1 heaping half cup (6 oz) Cookies & Cream ice cream
1/4 Cup hot fudge topping (chilled or room temp)
Preheat oven & spray an 8×8 baking dish generously with cooking spray. Combine brownie mix, eggs, and oil as directed on the back of the box, but do not add the water. Add ice cream and hot fudge to the brownie batter and stir to combine. Pour half of the brownie batter into the baking dish, layer with Oreos, then top with remaining batter. Bake for 40-50 minutes or as directed on the back of the box.

