Category: Kitchen
Poptart Pops
FOR THE TWO-BITE POPTARTS
1 c. fresh cherries, pitted and diced
3 T. sugar
2 T. cornstarch
2 T. water
1/2 tsp. almond extract
1 pkg. prepared pie crusts
FOR THE POPS
wooden popscicle sticks
FOR THE GLAZE
1 c. powdered sugar
1-2 T. milk
1/2 tsp. vanilla
food coloring and sprinkles (optional)
In a small saucepan, combine cherries, sugar, cornstarch and almond extract. Heat on stove over medium heat until mixture has thickened. Remove from heat and allow mixture to cool. Unroll pie crusts and using a pizza cutter to slice them into 1 1/2″x 2″ rectangles (I used a ruler to measure mine into equal sizes. Just use a butter knife to score your pie crust before cutting).
Place a wooden popscicle stick on top of one of the cut rectangles, then spoon a small amount (about 1 1/2 tsp.) of cooled cherry filling into the center of the pie square, taking care not to get it near the edges. Gently lay a second rectangle over the top of the cherry filling. Press the edges of the rectangles together with a fork. Transfer to a baking sheet. Bake poptart pops in an oven preheated to 400 degrees for 8-10 minutes, or just until the edges begin to brown.
In a small bowl, combine powdered sugar, milk, and vanilla to make glaze. Tint with food coloring, if desired. Spoon over cooled poptart pops, sprinkle with colored sugar, and allow to the glaze to harden slightly before serving. Enjoy!


great idea via
Tuxedo Strawberries
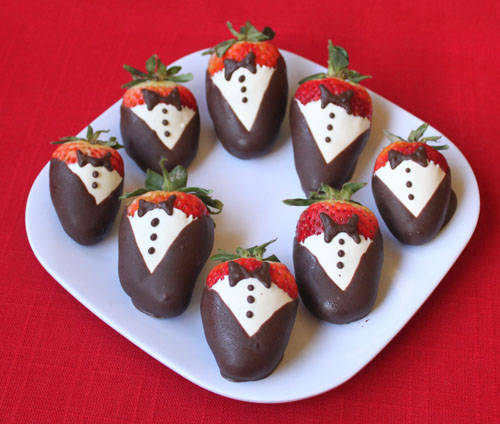
How adorable are these? This would be great for Bridal Parties or at a wedding reception. Here are the directions from pastry chef Elizabeth LaBau. Though the recipe seems long, it is only 4 basic steps. Love these.
Ingredients:
- 1 lb large strawberries
- 12 oz chocolate candy coating
- 12 oz white chocolate candy coating
Preparation:
1. Prepare a baking sheet by lining it with aluminum foil or waxed paper and set aside for now. Wash the strawberries and dry them carefully, as excess water can interfere with the dipping process.
2. Melt the white chocolate candy coating in the microwave, stirring after every 30 seconds to prevent overheating. Stir until the chocolate is completely melted and smooth.
3. Dip a strawberry into the white chocolate until it is almost submerged, but leave about 1/2-inch of undipped berry at the top. Allow excess chocolate to drip back into the bowl, and scrape the bottom of the berry against the lip of the bowl to remove excess white chocolate that might pool around the bottom of the berry. Place the berry onto the foil-lined baking sheet, and repeat with remaining berries, until all have been dipped in white chocolate.
4. Place the dipped berries in the refrigerator to set the white chocolate while you prepare the dark chocolate for dipping. Place it in a microwave-safe bowl and melt it, stirring after every 30 seconds to prevent overheating. Stir until the chocolate is completely melted and smooth.
5. Once the white chocolate is completely set on the berries, take one berry and dip it into the dark chocolate at a 45-degree angle, so that the chocolate covers one side of the berry on the diagonal. Now turn it in the opposite direction and dip the other side on a 45-degree angle. The final result should be a berry that has a white “V” of chocolate showing through a darker outer coating.
6. Allow excess chocolate to drip back into the bowl, and scrape the bottom of the berry against the lip of the bowl to remove excess chocolate that might pool around the bottom of the berry. Place the berry onto the foil-lined baking sheet, and repeat with remaining berries, until all have been dipped in dark chocolate.
7. Now it’s time to give your berries bow ties and buttons. To pipe these on, you can use a piping bag fitted with a small round attachment, a paper cone, or a plastic bag with the corner snipped off. Whichever method you choose, spoon some melted chocolate into your tool of choice. Make a bow tie by drawing two connected triangles at the top of the white V. Below this, place two or three dots for buttons. Repeat until all of your strawberries are decorated.
8. Place the tray back in the refrigerator to set the dark chocolate, for about 10 minutes. Your Tuxedo Strawberries are now ready to eat! They will keep in the refrigerator for several days, but I think they are best soon after they are made. If you do save them for 2-3 days, expect to see some condensation on them as they come to room temperature
Dripping Blood Glasses
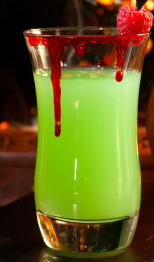
Pour ¼ cup of Clear Corn Syrup into a shallow bowl.Add a few drops of red food coloring and mix until the syrup has a bright red color.Using a clear glass tumbler dip the rim in the syrup mixture and set the glass on wax paper and allow to dry overnight. The syrup will drip down the glass creating the desired “dripping blood” effect. Fill with your favorite cocktails and make mocktails for the kids. great idea via
Deep Fried S’mores
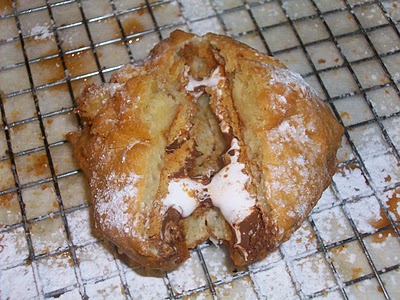
Smear marshmallow fluff onto a graham cracker. Place chocolate into fluff. Smear another graham cracker with fluff and make a sandwich. Rinse, wash, repeat to you have enough for a good old fashion tummy ache.
Place your S’Mores into the freezer for two hours. You want the marshmallows to harden enough that they fluff back in the oil but not disappear.
Coat the individual sandwiches in the sweet batter. Make sure it is thoroughly coated or you will have some greasy, burnt, disgusting chocolate swirling in hot oil to deal with.
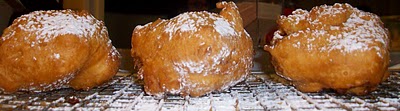
Heat your oil to 375 degrees and have the fry basket already submerged into the oil. Place the sandwiches into the fryer in pairs. Allow to bask in the oily goodness for three minutes. Pull the basket out of the oil and let excess oil drain away.
Click HERE for more goodness!

