
Category: Around the house
How to make a spiral pencil
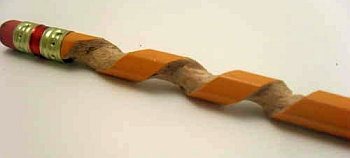 To make a spiraled pencil you will first need the right pencil. Most pencils are six sided, but you might want to find a round pencil to start with. Its shape will make it easier for beginners to practice on, although the hardness of the wood differs.
After you pick your pencil, you should decide whether or not you want it sharpened. If so, do it before whittling.
How to do it…
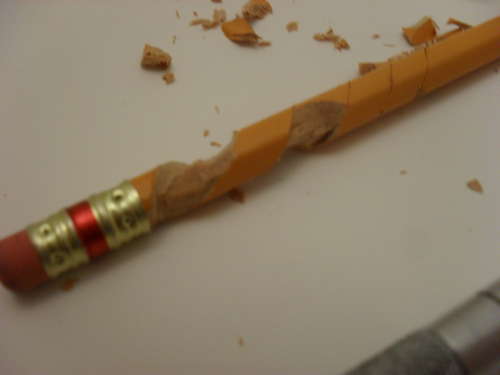
Start by cutting 2 lines that go all the way around the pencil in a spiral shape.

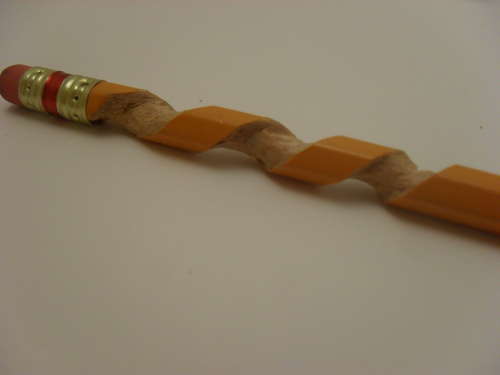
Now you can start cutting out the shape. Cut all of the wood from the surface of the pencil that lies between the two spiral lines. After that, start cleaning up the spiraled area. Simply scrape with the x-acto knife or sand with a file.
Tada!
Water bottle drinking bowl for your dog
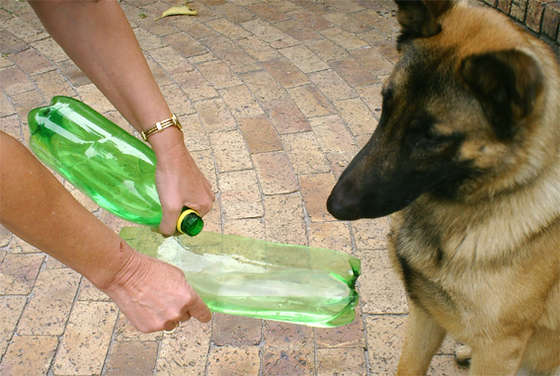 A simple solution to walking the dogs in an area with no water points.Basically two soda bottles one cut,in half lengthways.It then clips over the other.I sewed up a simple carrier and hey presto the dogs get that much needed drink of water on their walk.
So all you need is:
two 2 liter bottles
a cutter knife
some webbing
a quick release buckle
a sewing machine and about 20 minutes

Build Your Own Solar Sun Jar
Build your own Sun jar that collects and stores sunshine so that you can use it at night.
Components:
1. Ikea glass jar
2. Solar garden light
3. rechargeable battery (AA size)
4. Blu-tack
5. Tracing paperTools:
1. screwdriver
2. Utility Knife
3. Glass Frosting sprayStep A:
Rip open the innards of the solar garden light. I know that may sound ambiguous but you’d be able to use a utility knife and surgically dissect the relevent components out (see image). Solar garden lights are easily available at your local major hardware store. If you’re in Australia, try Dick Smith Powerhouse.Step B:
Flip open the ikea jar and place the “solar garden light innards” as shown in the picture. Use blu-tack to keep it all together. Feel free to play around with the placements so the components would fit snuggly into the jar.Step C:
Cut a strip of tracing paper and place it in the glass jar.
OR
Use a Glass Frosting spray .Step D:
Close the lid of the glass jar with tender care and you’re done.
Clean Your Mattress
 Cleaning a mattress is a relatively easy job and can take as little as thirty minutes, plus the actual laundry time for the bedding. Strip the bedding off the mattress, even the protective mattress cover. If the mattress cover is made out of cloth, put it into the washer. (Make sure you read the tag on the mattress cover to see if there are any special cleaning instructions.) Add some bleach and laundry soap to the machine and wash in hot water. When finished, place the articles into the dryer.
If the weather is nice outside and you have help,now would be a good time to take the mattress outside and let it air out. If this isn’t the right time to air out the mattress, just go on to the next step.
With nothing on the mattress take out your vacuum and put the hose on it. Vacuum the mattress and make sure you get into the little crevices and seams. If there are a few stains on the mattress, take time to try and remove them. Using a good disinfectant like Lysol, spray the mattress. This will help get rid of all those little dust mites.
Turn your mattress over and repeat the cleaning process. When you are finished vacuuming, keep this side up. Rotating the mattress every season prolongs the life of the mattress.
When the cleaning process is finished put the protective mattress cover back on. Not only does the cover protect the mattress, it also gives some protection from the dust mites. Place the clean bedding back onto the bed. Now you have a really clean bed from the mattress up.
It has been recommended to do this process at least two times a year, but four times a year (every season) would keep those dust mites away and reduce your chances of related allergies.
