Category: Crafts
Pumpkin Seed Ornaments
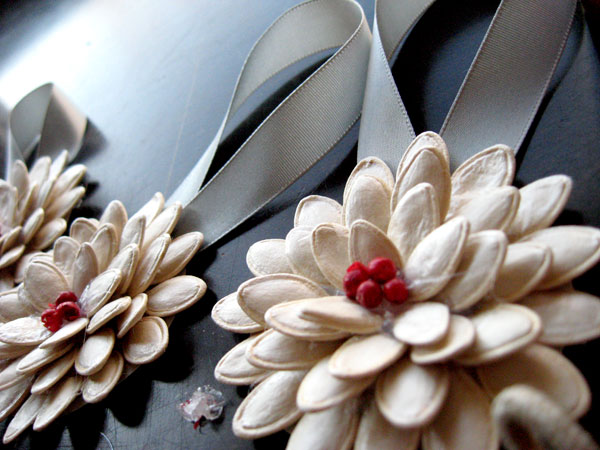
Here are the supplies you will need:
- 1. Dry pumpkin seeds
- 2. Something for the center, either a coffee bean, I used red peppercorns
- 3. Ribbon to hang them
- 4. cardboard fro a cereal box or cardstock
- 5. Glue gun and glue sticks or craft glue for youngsters
First cut a circle out of cardstock about 2 ” in diameter. Start hot gluing the outer row of seeds, being sure to overlap the edge of circle so it’s not shown. Next row build up as in photo by overlapping previous row. Continue. Add the peppercorns or other seeds in center with hot glue (be careful!). Add ribbon to back. You can use a hair dryer to melt and blow away the hot glue webs once everything is set.
pic via pinterest
DIY Dried Gourd Drum
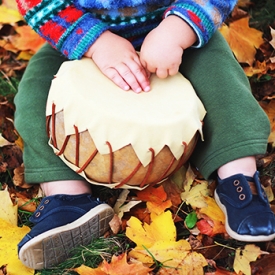
What you need:
-Dried gourd
-Leather
-Leather lace
-Scissors
-Dust mask
-Pencil
-Miterbox saw
-Super glue
-Shoe polish
Crocheted Bunny
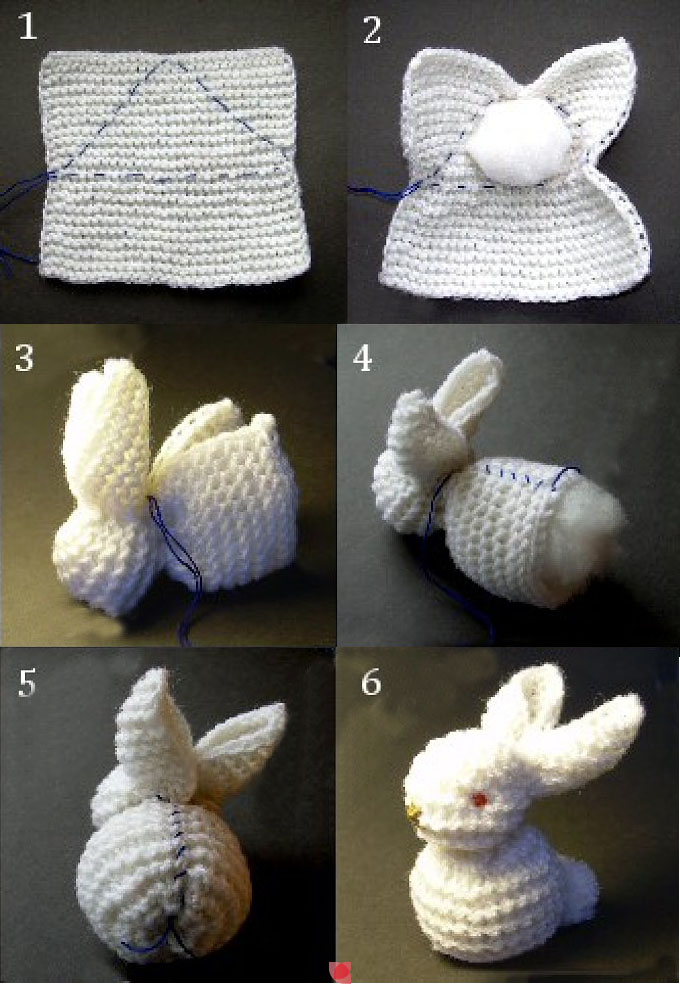
First crochet (or knit) a washrag using your favorite pattern. Then using a coordinating thread (the blue in photo is just for instructional purposes) to sew up as pictured; adding fluffs of poly-fill or cotton balls. Make sure to add a pompom of white for the tail and eyes and nose with colored embroidery floss or beads.
pic via pinterest
Cub Scout Framed Keepsake
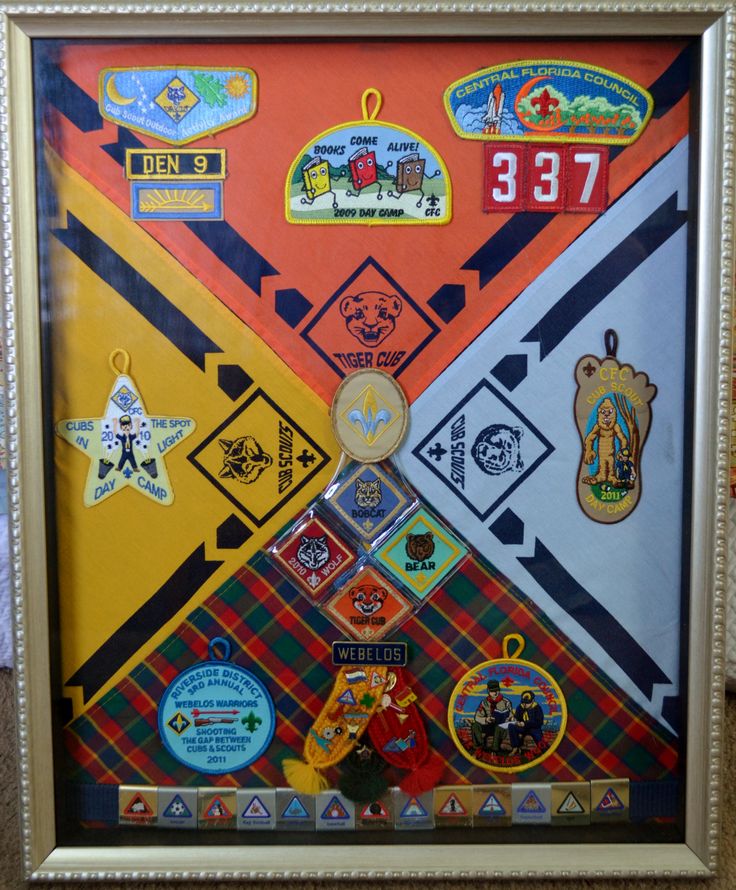
Use a shadow box frame 12″x12″. Plan on attaching everything to the cardboard included or a piece cut to fit.
First attach the neckerchief points to the center; and then start attaching the other items. You may need to experiment with your method of attaching.. if all else fails use some clear quilting thread and sew the items through the back drop.
photo via pinterest – not credited. Let me know if you know who came up with this awesome idea.

