Category: Crafts

Yo-Yo Pine Trees

•Assorted fabric
•Clover Extra Small Quick Yo Yo Maker template (optional)
•Thread, string
•Sewing Needle
•Pinecones
•Clear drying glue

Steps: Make as many small yo-yos as needed for the pinecone.
Stuff each yo-yo.
Secure stuffed yo-yo to the pinecone with a small drop of clear drying glue. Optional: glue onto an old jar cap to make tree stand upright. via

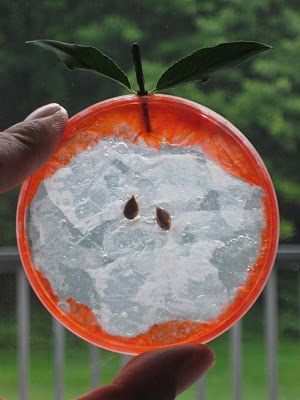
Apple Suncatcher Craft

Supplies: clear glue, paint brush, clear plastic lids, hole punch, white, red or green tissue paper, stem with leaves (or use a brown pipe cleaner and green tissue paper cut into a leaf shape), apple seeds (or brown paper cut into seed shapes)

Day 1

Glue seed to inside of lid. Looks like a petri dish. Have kids arrange seeds using a toothpick.
Let dry overnight.

Adult prep: Determine top of apple and punch hole as far away from outside edge as possible.

Day 2

Rip tissue paper into small pieces.

Glue white tissue paper on inside of lid. Overlap paper for good coverage.
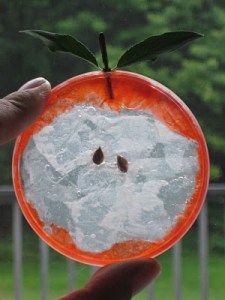
Easiest method. Squirt glue all over lid. Spread it with a paint brush. Lay pieces of tissue on top. Brush with a bit more glue on top. This way fingers should stay clean.

Rip green or red tissue into thin strips. Add glue around inside edge. Place tissue down and using the paint brush – gently push and coax paper into place. Children will need an adult to demonstrate how to do this. It doesn’t need to be perfect. It actually looks better the less precise it is. Let dry.

Adult prep: Glue stems into holes. A glue gun is probably the fastest. Older kids can glue the stem into place when gluing the tissue on by laying pieces of tissue over stem like bandages to secure.

They make great sun catchers too! Tie a thread or ribbon through the hole so kids can hang them from a window.

GREAT IDEA VIA

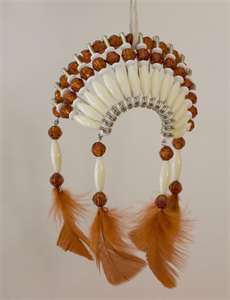
Native Headress Pin or Neckerchief

Materials:

  • 15 safety pins ( I used small brass ones )
  • “E” beads ( I used a variety of colors )
  • 6 mm round beads ( I used faceted ones )
  • approx. 8″ of 20 gauge wire
  • 1/2 pipe cleaner ( I used gold )

Instructions:

  1. String “E” beads on pin in desired pattern. Do 14 pins the same way. ( I experimented with different colors. Each of the above will represent a feather so you may want to use a pattern here. )
  2. Pinch heads of pin closed, so that they don’t open while wearing. IMPORTANT SAFETY FEATURE!
  3. String 6 mm beads and heads of pins on wire. Start with a bead and fold wire back over bead to keep it on. Alternate beads and pins, being sure to put all pins facing the same way. (This is where I created a pattern. Ex. blue faceted 6mm bead,1 pin w/red beads, blue faceted 6mm, 1 pin w/white beads, blue faceted 6mm, 1 pin w/blue beads, blue faceted 6mm, 1 pin w/white beads, blue faceted 6mm,1 pin w/red beads, etc…..) End with a 6mm bead, leave enough wire to fold back over bead as you did at start, then trim excess wire away. Be sure ends are folded back enough so that there is no sharp point.
  4. String pipe cleaner through loops at bottom of pins, pushing pins close together, and centering pipe cleaner.
  5. On ends of pipe cleaner string several beads, either “E” or 6mm. ( I used 3 blue faceted 6mm beads on each end) Form excess pipe cleaner into a loop, and twist to secure.
  6. Take your last pin and pin the first beaded pin and last beaded pin on the back of the slide. This will help to form shape, and is used to create area to put neckerchief through.
  7. Adjust shape, pull “tails” straight, then wear with pride.

photo is just for demonstration. Finished prject may differ. instructions via


Cable Braided Necklace

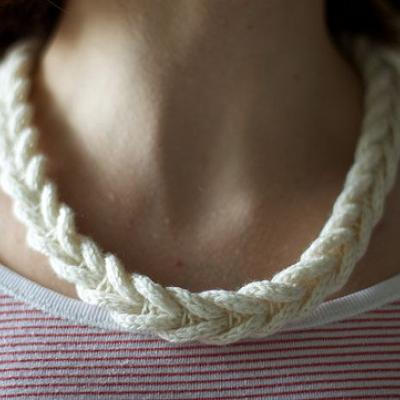
Ran across THIS TUTORIAL when looking for the MLB corded necklaces that the players are wearing. If you arent into creating it from scratch totally, get a piece of scrap and start in the middle of the steps– you’ll see, it’s not too difficult– Check it out!