Use apple slices, peanut butter and marshmallows to make these fun snacks!

You can do it – Here's how!
Category: Kids
Materials:
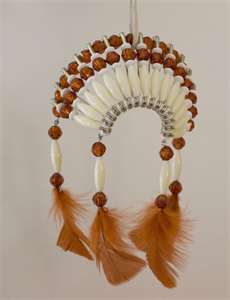
Instructions:
photo is just for demonstration. Finished prject may differ. instructions via
 6 T Baking cocoa
 Painting with light is a fun technique that gives great results. It is called painting with light because this is what you are actually doing while taking the shot – painting with light.
You don’t need much to experiment with this kind of shot, just make sure you have the following items:
1. A camera capable of long exposures – film cameras will work OK, but if you really want to get the most out of the shooting session, use a digital camera. You will be able to see the results in “real time” and make corrections as you go.
2. A nice tripod. Since you will be doing some long exposures you want to make sure your camera sits still.
3. A flash light – and by flash light I do not mean flash as in a speedlight, but the flash light or what our British will call a torch.
4. A dark location. This one is tricky. If you are going to shot at home – a dark room will be OK. If you are going to shoot outside – make sure that you are not doing this under a street light, or where a car can come by and “paint its headlight” all over your shot.
Here is how it’s done:
Set your camera on the tripod and take a sample shot with flash / lights on. This will help you verify that your composition is OK.
Set the exposure to a relatively long value. Stop down the aperture as much as you need. If you are outside do nothing. If you are inside – this is the time to turn off the lights.
Make the click. Once the shutter is open use your flashlight to light the stuff that you want to “paint”. You can use the flashlight as a brash, and “smear” the light, just like you would have done with brush and paper. Or, you can use the light as a pen, and do precise work. Areas where you go slowly will be more lit then others. Be careful not to linger to much over the same stop – you will burn it. (The machos amongst you will correctly identify this as the “I forgot the iron on the shirt” phenomena).
Once the shutter closes, you are a free person again. Inspect your image and make corrections. via
 Follow the Leader (also known as the Copycat Game) is an action game that serves as a good energizer or warmup activity. It can be pretty hilarious watching people mimic the leader, especially if the leader does some wacky movements. There is no preparation needed for the Follow the Leader game. Find a large open space, either indoors or outdoors, and you’re ready to go!
How to Play
Ask everyone to stand and arrange the group into a circle, facing inwards. Ask one person to leave the room for a minute. This person will be the guesser for the round. While he or she is gone, the group decides who should be the “leader.” The leader will be the one who sets the movements for that round. When this person is chosen, invite the guesser to come back. The guesser stands in the very center of the circle.
When the round begins, everyone starts swinging their arms up and down. The leader will eventually begin to do other movements, and everyone else mimics the leader’s actions, without being too obvious to reveal who the leader is. The leader can do just about anything he or she wants, such as:
Everyone in the circle should be careful to avoid prolonged eye contact with the leader, so the leader’s identity is not given away. The guesser must keep turning his or her head to try to figure out which person is the leader (the person who is starting of all the group’s movements). The guesser is allowed to make up to three guesses. If the guess is incorrect, the round continues. If the guess is correct, the leader becomes the new guesser for the next round. If all three guesses are exhausted and the leader is not correctly guessed, the round ends and you can either keep the same guesser or switch it up.
This action game tends to be hilarious, as people try to copy the leader’s silly movements. See photos of an example of the game being played below.

