Category: Outdoors

Wasp Trap

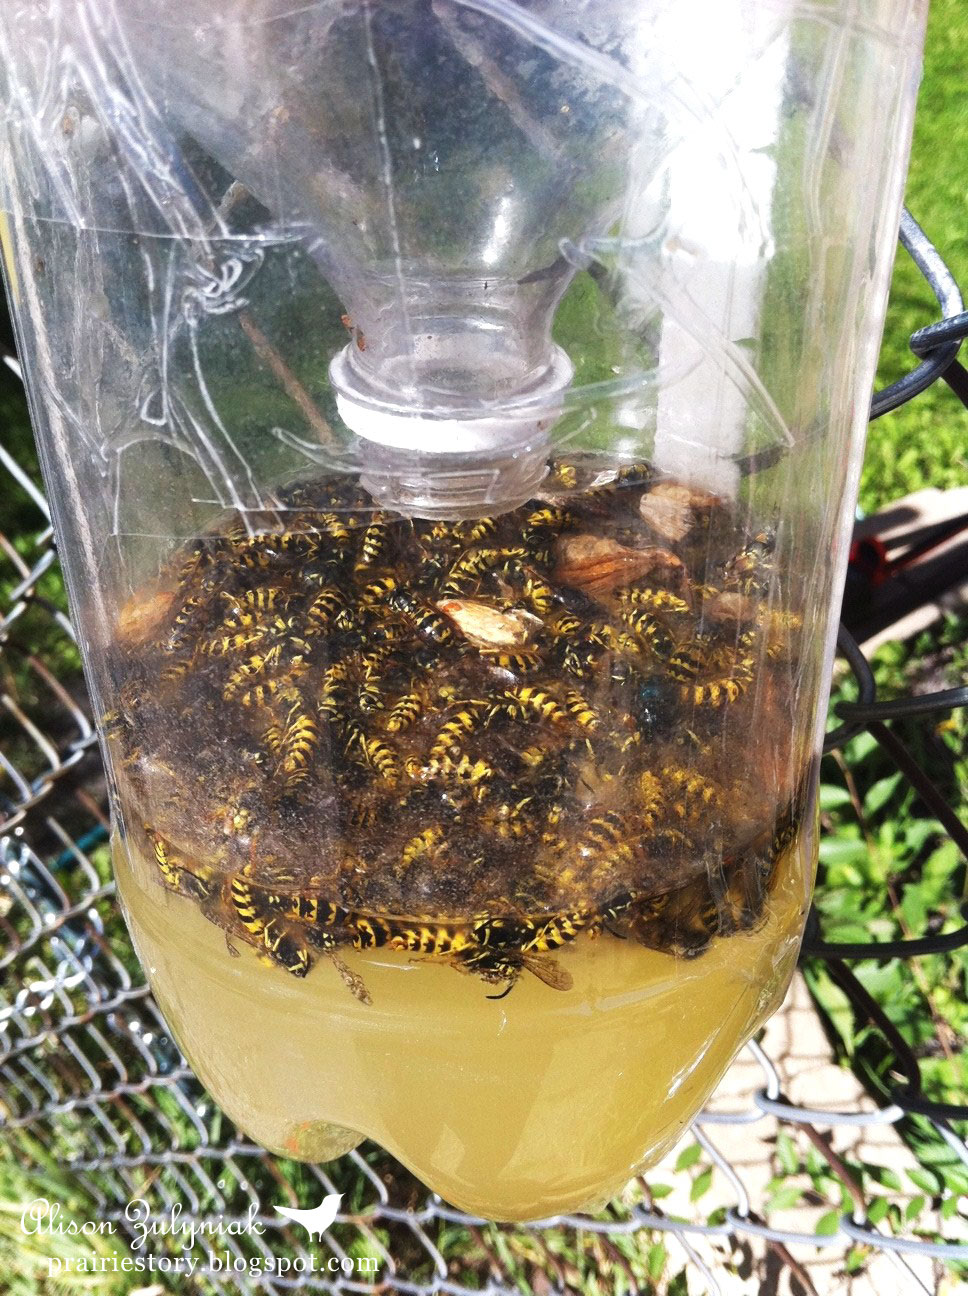
Reblogged from Prairiestory. Ok… this is kind of gross, but clearly it works. Once the wasps go in the bottle they can’t figure out how to get out so they get trapped and die. This will minimize wasps, but the only way to eliminate them is to remove their nest or kill the queen.

1) Cut the neck off a plastic pop bottle.
2) Remove the bottle cap and flip the neck upside down and place it in the bottle opening that you just cut.
3) Tape together using packing tape or duct tape.
4) Bait the trap. The easiest is sugar and water, but I’ve also read that meat works well in the spring and early summer because wasps are attracted to protein, or other options are sugar and water, water and vinegar, beer, soda, even laundry detergent. Adding petroleum jelly or cooking oil along the steep edges of the trap can cause them to lose their footing and fall into the hole.
5) Hang the trap by either taping a string to it, or affixing a screw that you can use to hang.
6) Empty the trap – but first make sure the wasps are dead by pouring boiling water in or freezing. Personally, I’ll just dispose of entire trap and make a new one.

One last note, be mindful where you place the trap as living wasps will be attracted to it. Place a distance from where your kids or pets will be spending time.

Crepe Paper Flowers, for Cinco De Mayo

Reblogged from honestlywtf:

You’ll need:


First, lay out the sheets of crepe paper and fold each one into an accordion. The folds should measure about 2-3 inches thick and should be creased along the natural, horizontal lines of the crepe paper. Don’t worry about the folds being absolutely perfect! (Click on images to enlarge)

Keep each bundle bound together by a small binder clip or large paper clip.

Working with the outer color first, gradually trim down the length of each sheet in 1-2 inch increments. This will ultimately give the flower its depth.

With scissors, trim the ends into rounded and pointy shapes. Again, don’t worry about being too precise – irregularity will make the flower look more natural! Realign the binder clips to the center of each bundle.

Cut along the folds of each bundle  . . .

. . . until the scissors hit the edge of the binder clip, leaving the center uncut. Repeat the same steps on all four sides.

Unbind each bundle. Lay the sheets on top of each other with the largest, outer color on the very bottom and the smallest, innermost color on top. Be sure to center the sheets as best as possible. Then, start folding all the layers into an accordion.

Roll the bunch inwards and tie a piece of floral wire around the middle.

Secure the wire by giving it a few twists. Fan out the folds, exposing the strips of the first layer.

Gently peel forward one strip at a time and using both hands, stretch the paper open.

I suggest peeling forward every other or every two strips to give the flower a more organic look. And remember to constantly fan out the bundle since some strips may be tucked away between other layers. Once the first layer is done, move onto the next layer and color.

Slowly and gently peel forward all the strips from each layer. Though you might have to adjust some of the petals, the flower will naturally take it’s own shape.

Continue peeling the layers. If a strip is too big or out of place, feel free to use scissors to trim or shape it.

Soon enough, your crepe paper flower will be finished. And I dare you to make just one!

Tie a few into a tree . . .

. . . or hang them from a chandelier! But most importantly, HAVE FUN!

Stack of Flower Pots

Idea via pinterest: But you can make your own!

Use a strong garden stake, or a piece of rebar from your home and garden store.

Get several clay pots, the kind with the hole in the center of the bottom.

Start at ground level with the biggest pot. Tilt it until the side touches the stake. Repeat tilting opposite way every other pot.

Fill pots with soil and your favorite plants!

Cute – would be a great surprise for Mom on Mother’s Day!

*Update: Best to use rebar – (for strength) and hammer it into the ground- you don’t want your pots leaning or falling over.*